
WooCommerce add to cart beneath the picture Divi is an important side of e-commerce web site design, making certain seamless consumer expertise. This information meticulously particulars the method, from preliminary integration to superior styling and responsive design concerns. The challenges inherent in aligning “Add to Cart” buttons with photographs, notably within the context of the Divi theme, are addressed comprehensively.
Integrating WooCommerce with Divi for an internet retailer requires cautious consideration of button placement, responsiveness, and visible enchantment. This information supplies sensible options and examples to successfully place the “Add to Cart” button beneath photographs, making certain a visually participating and user-friendly purchasing expertise.
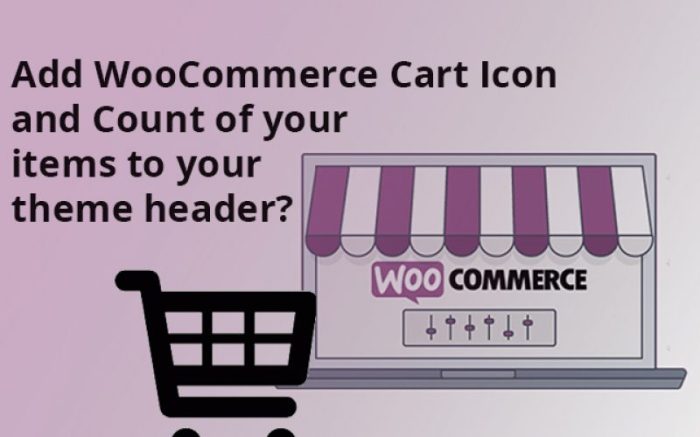
Introduction to WooCommerce and Divi Integration
WooCommerce is a well-liked open-source e-commerce plugin for WordPress, empowering customers to create on-line shops simply. It seamlessly integrates with WordPress, leveraging its sturdy content material administration system. WooCommerce handles essential elements of on-line retail, together with product listings, purchasing carts, cost processing, and order administration. It supplies a versatile framework for varied enterprise fashions, from easy product gross sales to advanced multi-tiered shops.Divi is a flexible WordPress theme famend for its customization choices and sturdy design capabilities.
It affords a variety of pre-built layouts and customization instruments, enabling customers to create visually interesting and purposeful web sites. Divi’s flexibility extends to integrating with plugins like WooCommerce, making it a well-liked selection for constructing e-commerce web sites. Its modular construction and in depth theme choices facilitate a personalised consumer expertise, making it a strong software for on-line shops.
Basic Integration Course of
The mixing of WooCommerce and Divi includes a number of steps. First, putting in and activating WooCommerce on a WordPress web site is essential. Then, Divi’s theme customization choices are used to combine WooCommerce’s functionalities. This may occasionally contain choosing applicable layouts, configuring product show choices, and making certain compatibility with the chosen cost gateways. Particular steps will fluctuate primarily based on the specified retailer design and performance.
Cautious consideration to theme customization settings is important to keep away from conflicts.
Widespread Challenges in WooCommerce and Divi Integration
A number of potential challenges come up throughout the integration of WooCommerce and Divi. Compatibility points between the plugin and theme are a frequent downside. Theme updates or plugin upgrades might result in surprising behaviors or conflicts. Understanding the plugin’s documentation and troubleshooting guides is essential for resolving these points. Moreover, the complexities of the combination can require technical data and expertise to make sure clean operation.
Inaccurate configuration settings, equivalent to improper plugin activation or theme customization, can hinder correct performance.
Significance of “Add to Cart” Button Placement Under Pictures
The strategic placement of “Add to Cart” buttons beneath product photographs is crucial for a optimistic consumer expertise. It improves usability by permitting prospects to simply entry the acquisition course of with out navigating away from the picture, which is the focus of the product presentation. A well-designed e-commerce platform prioritizes an easy path to buy, thereby enhancing the client journey.
This technique additionally reduces the cognitive load on the client, streamlining the shopping for course of. Research have proven that prominently positioned “Add to Cart” buttons improve conversion charges.
Figuring out Current “Add to Cart” Button Implementations
WooCommerce, a well-liked e-commerce plugin for WordPress, steadily incorporates “Add to Cart” buttons to facilitate product purchases. Understanding how these buttons are usually applied, their variations, and their integration with photographs is essential for efficient web site design and consumer expertise. This part explores frequent approaches to button placement, styling, and visible enchantment.
Typical Placement of “Add to Cart” Buttons
The “Add to Cart” button’s placement is usually straight related to product shows. A standard location is straight away beneath the product picture and above any detailed product descriptions. This strategic positioning permits for a transparent visible cue and fast entry for customers searching product pages. Different areas embrace inside a product carousel, a product comparability desk, or inside a aspect panel.
Variations in Current Implementations
Variations in “Add to Cart” button implementations embrace completely different button types (e.g., coloration, form, and dimension). Some implementations incorporate a delicate animation or visible cue when the button is interacted with, signaling profitable addition to the cart. These variations intention to enhance the consumer expertise and match the general aesthetic of the web site.
Integrating the Button with Pictures
Integrating the “Add to Cart” button with product photographs usually includes cautious spacing and alignment. The button is steadily positioned beneath or beside the picture to keep away from obstructing the picture’s main focus. The button’s dimension and coloration are usually chosen to enrich the picture and total design scheme.
Styling the Button and Surrounding Parts
Styling the button and its surrounding parts is important for visible consistency and enchantment. Button colours are steadily chosen to distinction with the picture and background to make sure clear visibility. Widespread design concerns embrace font choice, button form, and using hover results to reinforce consumer interplay. Efficient styling creates a cohesive and user-friendly expertise.
Examples of Visually Interesting “Add to Cart” Buttons Beneath Pictures
Visually interesting “Add to Cart” buttons beneath photographs usually use contrasting colours for improved visibility. A button in a shade of orange or inexperienced, towards a impartial background, will clearly stand out towards a product picture. The button’s form is steadily rectangular or sq. to supply a clear and arranged look. A delicate hover impact, equivalent to a slight change in coloration or opacity, additional enhances consumer interplay and engagement.
These aesthetic decisions improve the general visible enchantment and usefulness of the button.
Designing a Responsive “Add to Cart” Button Placement
Responsive design is essential for e-commerce web sites to make sure optimum consumer expertise throughout varied units. A well-designed “Add to Cart” button, seamlessly built-in with the product picture, considerably impacts conversion charges. This part explores methods for implementing a responsive “Add to Cart” button that adapts to completely different display screen sizes, sustaining visible enchantment and consumer expertise.The position and design of the “Add to Cart” button needs to be meticulously deliberate to keep away from disrupting the consumer’s move.
A user-friendly button that’s simply accessible and visually interesting can result in the next conversion price. It needs to be thought-about that completely different display screen sizes require completely different button placements and sizes to make sure performance and a great consumer expertise.
Format Issues for Various Display screen Sizes
Efficient responsive design for the “Add to Cart” button necessitates consideration for display screen dimension variations. A hard and fast place for the button on smaller screens would possibly impede necessary product info. On bigger screens, a button that is too small would possibly seem much less outstanding.
| Display screen Dimension | Button Fashion | Button Place | Button Dimension |
|---|---|---|---|
| Cell (320-480px) | Smaller, visually outstanding | Under the picture, centered, presumably in a devoted button space | Compact |
| Pill (481-768px) | Medium dimension, barely bigger than cellular | Under the picture, centered, presumably in a devoted button space | Medium |
| Desktop (769px and above) | Bigger dimension, extra outstanding | Under the picture, centered, presumably with a delicate hover impact | Massive |
Adapting to Various Picture Sizes and Side Ratios
The button’s design ought to regulate to accommodate varied picture sizes and side ratios with out compromising its visible enchantment or performance. A hard and fast-size button would possibly look disproportionate or cramped if paired with a really tall or large picture. That is essential to forestall a poor consumer expertise on smaller screens.A versatile button, with responsive sizing primarily based on the picture’s dimensions, can remedy this downside.
This may be achieved through the use of CSS methods to resize the button relative to the picture. This permits the button to stay outstanding and purposeful whatever the picture dimension. Think about using CSS grid or flexbox layouts to place the button and guarantee responsiveness.
Centering the Button Beneath the Picture
The button’s place needs to be fastidiously centered beneath the picture to keep away from visible muddle and keep a clear structure. Strategies for centering embrace utilizing CSS flexbox or grid layouts. These permit for straightforward customization and adjustment for various display screen sizes. The positioning ought to keep a visually pleasing relationship between the picture and the button.Utilizing CSS flexbox properties (like `justify-content: heart`) on the container that holds each the picture and the button can simply heart the button beneath the picture.
This supplies a clear and constant structure throughout all display screen sizes. An alternative choice is utilizing CSS grid structure to realize an analogous centering impact, making certain alignment with the picture’s place.
Sustaining Visible Enchantment and Consumer Expertise
Sustaining visible enchantment and consumer expertise throughout units is paramount. Visible consistency is essential to making a optimistic consumer expertise. This contains utilizing applicable button colours and typography that complement the general web site design and really feel. Using correct spacing across the button can also be crucial to forestall visible muddle.Sustaining a transparent visible hierarchy is essential. The button ought to stand out with out overwhelming the picture or different design parts.
This may be achieved by adjusting the button’s dimension and coloration primarily based on the picture. It will be sure that the button is straightforward to find and work together with. Moreover, the design needs to be optimized for accessibility, contemplating components like coloration distinction and button dimension.
Integrating the Button with Picture Performance
Integrating the “Add to Cart” button with picture performance requires cautious consideration of dynamic show, responsive positioning, and visibility no matter picture attributes. This ensures a seamless consumer expertise, stopping the button from obstructing essential product info. A well-integrated button enhances the general aesthetic enchantment and usefulness of the product show.
Dynamic Button Show Primarily based on Picture Loading
Implementing dynamic show of the button hinges on the picture loading course of. JavaScript performs a vital position in detecting when the picture is totally loaded. A standard method includes utilizing the `onload` occasion listener. This ensures the button is displayed solely after the picture has been efficiently retrieved and rendered, stopping the button from showing prematurely or flashing earlier than the picture.
Adjusting Button Place Primarily based on Picture Dimension Modifications
Picture dimension variations, particularly on completely different display screen sizes or inside responsive designs, necessitate adjusting the button’s place. This ensures the button stays seen and accessible, even when the picture scales. Using CSS `place: absolute;` together with applicable `high` and `left` values permits exact management of the button’s placement relative to the picture. Media queries might be employed to tailor the button’s place to completely different display screen sizes and resolutions.
This technique additionally prevents the button from overlapping with the picture’s content material, even when the picture dimension is altered by the consumer or the web site’s design.
Making certain Button Visibility No matter Picture Attributes
The button’s visibility should not depend upon the picture’s alt textual content or caption. Even when these parts are lacking or have empty strings, the button ought to stay seen. Making certain the button’s placement is impartial of the picture’s alt textual content or caption includes setting the button’s place utilizing CSS. By using a hard and fast place and relative positioning, the button will stay seen whatever the content material throughout the picture.
The positioning of the button needs to be pre-determined to keep away from obstructions and overlap.
Stopping Button Obstruction of Necessary Info
To keep away from obstructing necessary info, the button’s place should be fastidiously thought-about. A key side is making certain the button would not overlap or obscure essential particulars, equivalent to product descriptions, critiques, or pricing. The button needs to be positioned beneath the picture, making certain it would not disguise important info. A method to mitigate overlap is to set a selected margin or padding worth for the button within the CSS, making certain satisfactory spacing from the picture and different content material parts.
Step-by-Step Process for Putting the Button Under an Picture, woocommerce add to cart beneath the picture divi
This detailed process Artikels learn how to place the button beneath the picture, sustaining responsiveness and visibility.
- Determine the Picture Factor: Use JavaScript to focus on the picture component on the web page.
- Decide Button Placement: Determine on the exact place (e.g., beneath the picture) utilizing CSS `place: absolute` or `place: relative` and `high`, `backside`, `left`, and `proper` values. Calculate the suitable offset.
- Implement Dynamic Positioning: Make use of JavaScript to make sure the button’s positioning updates in real-time primarily based on the picture’s dimensions or any changes that will happen.
- Fashion the Button: Make the most of CSS to type the button, together with its background coloration, textual content, and padding. Alter styling as wanted to suit the picture and total web site design.
- Testing and Refinement: Totally check the button’s visibility and positioning throughout completely different display screen sizes and browsers. Alter the CSS values as wanted to make sure a seamless consumer expertise.
Styling and Customization of the Button
Customizing the looks of the WooCommerce “Add to Cart” button inside a Divi theme permits for a seamless integration with the general design. Cautious styling ensures the button enhances the consumer expertise by visually signaling its objective and aligning with the theme’s aesthetics. This part explores strategies for modifying button look, incorporating customized CSS, and aligning the button with the Divi theme’s design language.
CSS Customization Strategies
Customizing the button’s visible attributes, equivalent to coloration, form, and font, is achieved by means of CSS. These modifications permit for a constant and aesthetically pleasing integration with the prevailing theme parts. By leveraging CSS selectors, builders can goal particular parts and apply distinctive types to the “Add to Cart” button.
Button Kinds and Corresponding CSS
Totally different button types might be applied to match varied design themes. The next desk demonstrates a number of button types and the corresponding CSS code. These types cater to completely different aesthetic preferences and make sure the button’s visible consistency.
| Button Fashion | CSS Code |
|---|---|
| Main Button (Default) |
.woocommerce button.button
  background-color: #4CAF50;
  coloration: white;
  border: none;
  padding: 10px 20px;
  border-radius: 5px;
  cursor: pointer;
|
| Secondary Button (Muted) |
.woocommerce button.button.button-secondary
  background-color: #e0e0e0;
  coloration: #333;
  border: 1px stable #ccc;
  padding: 8px 15px;
  border-radius: 4px;
  cursor: pointer;
|
| Hover Impact |
.woocommerce button.button:hover
  background-color: #45a049;
|
| Rounded Button |
.woocommerce button.button
  border-radius: 20px;
|
Integrating Customized CSS
Integrating customized CSS into the Divi theme construction might be achieved utilizing varied strategies. One method is to make the most of Divi’s theme customizer. This method permits for straightforward modifications and previewing of modifications with out straight modifying the theme information. Alternatively, utilizing a baby theme is really useful for sustaining theme updates.
This observe prevents customized modifications from being overwritten throughout theme updates.
Complementing the Divi Theme Design
The “Add to Cart” button ought to seamlessly combine with the Divi theme’s total design aesthetic. Contemplate the theme’s coloration palette, typography, and total structure when choosing button colours, fonts, and sizes. Making certain consistency in type parts between the button and different theme parts creates a cohesive consumer expertise. Matching the button’s font to the theme’s main font and utilizing colours from the theme’s coloration palette helps in sustaining visible concord.
Dealing with Numerous Picture Sorts and Sizes
Totally different picture codecs and sizes considerably impression the visible presentation and performance of the WooCommerce “Add to Cart” button. Making certain the button seamlessly integrates with various picture attributes is essential for a optimistic consumer expertise and a constant visible design. This part particulars methods for dealing with numerous picture varieties and sizes, sustaining button placement and responsiveness, and stopping points like untimely button show.
Picture codecs like JPG, PNG, and GIF have various traits that have an effect on show and loading. Acceptable dealing with ensures the button’s visible consistency throughout these codecs, avoiding surprising show inconsistencies.
Managing Picture Codecs
Totally different picture codecs have an effect on the button’s visible consistency. JPGs, identified for compression, would possibly result in barely various picture sizes in comparison with PNGs, which protect extra element however are bigger in file dimension. GIFs are primarily used for animations and have restricted coloration palettes, influencing their total show. Dealing with these codecs accurately ensures that the button maintains a constant visible relationship with the picture, no matter the format.
Using responsive design rules will make sure the button scales appropriately with the picture, mitigating the impression of differing picture codecs.
Making certain Constant Button Show with Various Picture Sizes
Sustaining a constant button placement and dimension relative to completely different picture dimensions is essential for a user-friendly expertise. A button that overlaps or seems too massive or small relative to the picture might be jarring. Implementing responsive design methods permits the button to regulate its place and dimension dynamically, accommodating numerous picture sizes with out compromising the visible concord.
Utilizing CSS properties like `place: absolute` and `left`, `high` attributes can keep exact positioning relative to the picture. Cautious calculation of percentages, or `width` and `top` in pixels, will make sure the button maintains a correct dimension relative to the picture. Using JavaScript and doubtlessly a library like jQuery can dynamically resize the button primarily based on picture dimensions.
Managing Picture Loading and Stopping Untimely Button Show
The “Add to Cart” button ought to seem solely after the picture has totally loaded to keep away from a jarring visible expertise. Untimely show can disrupt the consumer move. Implementing a loading mechanism, equivalent to a placeholder or a spinner, throughout the picture loading course of can present a greater consumer expertise. Utilizing JavaScript to watch the picture’s loading standing, usually by means of the `onload` occasion, is a dependable method.
This permits the button to be displayed solely after the picture has completed loading. This method avoids a noticeable delay between picture and button look, which is essential for sustaining a clean and interesting consumer expertise.
Sustaining Button Place Relative to Picture
Sustaining the button’s place relative to the picture is important for a cohesive design, particularly when coping with responsive photographs. The button ought to stay aligned with the picture, whatever the picture’s dimension or responsiveness. Utilizing absolute positioning and calculating the button’s place primarily based on the picture’s dimensions permits for a constant placement throughout completely different display screen sizes. By using JavaScript or CSS media queries, the button’s positioning might be adjusted dynamically primarily based on the picture’s dimensions.
Responsive Sizing of the Button
The button’s dimension needs to be conscious of the picture’s dimensions. A button that’s too massive or too small relative to the picture can detract from the general visible enchantment and consumer expertise. Responsive sizing includes calculating the button’s dimensions primarily based on the picture’s dimensions. Utilizing JavaScript and calculating the proportion of the picture’s width or top can dynamically resize the button to match the picture.
CSS media queries can additional refine the responsiveness to make sure the button adapts accurately throughout completely different display screen sizes. Utilizing percentages for button width and top is an efficient strategy to obtain responsiveness, because it permits the button to scale proportionally with the picture.
Troubleshooting Widespread Points

Integrating a WooCommerce “Add to Cart” button beneath a Divi picture requires cautious consideration to element, and potential points can come up. Understanding the attainable issues and their options is essential for a seamless consumer expertise. This part particulars frequent pitfalls and supplies efficient troubleshooting methods.
Troubleshooting includes figuring out the supply of the issue, using methodical debugging methods, and implementing applicable fixes. Cautious examination of the code and design parts, coupled with a methodical method, is important to resolving any points that will come up.
Responsiveness Points and Button Placement
Correct responsiveness is paramount for a optimistic consumer expertise throughout completely different display screen sizes. Issues in button placement might manifest because the button overlapping the picture or not aligning accurately on smaller screens.
- Viewport-specific Changes: Making certain the button adapts to varied display screen sizes is essential. Media queries are important to regulate button place and dimension dynamically. Incorrect or lacking media queries can result in the button being obscured or misplaced on completely different units.
- Picture Scaling and Container Limitations: If the picture container would not regulate dynamically, the button won’t show accurately when the picture resizes. Using responsive picture methods (e.g., utilizing the `srcset` attribute) ensures the button stays seen and aligned whatever the picture’s dimension on completely different units.
- Incorrect CSS Guidelines: Issues with CSS guidelines (e.g., incorrect margins, padding, or positioning) can result in button placement inconsistencies. Cautious evaluate of the CSS code associated to the button and the picture container is important to make sure correct alignment and responsiveness throughout completely different display screen sizes.
Integrating the Button with Picture Performance
Integrating the button with picture performance requires meticulous consideration to code interactions. Potential points embrace the button not triggering the add-to-cart motion or failing to reply to image-related occasions.
- Incorrect JavaScript Interactions: Errors in JavaScript code dealing with the button’s click on occasion can stop the add-to-cart motion from being executed. Totally evaluate JavaScript code to make sure it accurately interacts with the WooCommerce add-to-cart performance and the button’s click on occasion.
- Lacking or Incorrect Occasion Listeners: Making certain the button’s click on occasion triggers the right JavaScript features is essential. Lacking or improperly configured occasion listeners can result in the button not responding. Verify if the right occasion listeners are connected to the button component and if the related features are correctly applied.
- Conflicting Plugins or Themes: Conflicts with different plugins or themes can disrupt the combination course of. Determine any conflicting plugins or themes that is likely to be inflicting the difficulty and discover a strategy to resolve the battle to make sure clean integration.
Troubleshooting Design-Implementation Discrepancies
Discrepancies between the supposed design and the precise implementation can stem from varied causes. Cautious comparability and validation of the visible parts are crucial to make sure the button aligns with the design specs.
- Visible Inspection: Thorough visible inspection of the button’s look on completely different browsers and units is essential. This permits for identification of visible inconsistencies that may not be obvious by means of the design preview.
- Cross-Browser Compatibility Testing: Testing the combination on completely different browsers (e.g., Chrome, Firefox, Safari) is important to determine any cross-browser rendering points. Confirm the button’s look and performance in every browser to ensure consistency.
- Comparability with Design Mockups: Evaluating the precise implementation with the design mockups or specs is a crucial troubleshooting step. Discrepancies between the supposed design and the implementation needs to be recognized and resolved.
Debugging the Integration Course of
Debugging the combination course of includes using methods to pinpoint and resolve errors. Cautious examination of the code and related knowledge is important.
- Console Logging: Using console logging within the browser’s developer instruments will help monitor the move of the code and determine potential errors. Logging crucial steps within the integration course of can present insights into the difficulty.
- Step-by-Step Examination: Methodical evaluate of the code (HTML, CSS, and JavaScript) associated to the button and picture integration helps pinpoint the supply of the issue. This includes fastidiously inspecting every element of the combination course of to determine any discrepancies.
- Testing with a Minimal Setup: Simulating the combination in a simplified atmosphere (e.g., a separate testing web site) helps isolate the issue to particular code or configurations. This may isolate the issue and make debugging extra environment friendly.
Demonstrating Greatest Practices: How To Woocommerce Add To Cart Beneath The Picture Divi
Implementing a “Add to Cart” button beneath product photographs in WooCommerce with Divi requires cautious consideration of consumer expertise and accessibility. Greatest practices guarantee a seamless and intuitive purchasing expertise, whatever the consumer’s machine or technical capabilities. This part particulars essential elements of efficient implementation, together with varied approaches and the significance of adhering to accessibility requirements.
Greatest Practices for WooCommerce and Divi Integration
Correct integration of WooCommerce and Divi ensures optimum performance and a optimistic consumer expertise. This contains aligning button placement with total web site design, making certain responsiveness throughout completely different display screen sizes, and prioritizing consumer accessibility. Using Divi’s built-in options and WooCommerce’s sturdy functionalities is essential to reaching a cultured and user-friendly design.
Comparability of Approaches for Button Placement
Totally different approaches for positioning the “Add to Cart” button beneath the picture supply various consumer experiences. An easy method includes straight putting the button beneath the picture. Alternatively, a extra subtle method would possibly make the most of a hover impact or a lightbox to show the button on interplay. This comparability evaluates every technique’s effectiveness and consumer suggestions.
- Direct Placement: This technique includes positioning the button instantly beneath the product picture. That is usually essentially the most easy implementation, providing a transparent and concise name to motion. Nonetheless, it will probably generally visually muddle the product show if not fastidiously designed.
- Hover Impact: This technique includes displaying the “Add to Cart” button solely when the consumer hovers over the picture. This method will help preserve house on the web page, notably for cellular units, however it won’t be intuitive for customers unfamiliar with the sort of interplay.
- Lightbox: Using a lightbox includes revealing the button inside a separate, overlaying window when the consumer clicks or interacts with the picture. This technique can present extra product particulars and improve the consumer expertise, however it will probably additionally add complexity to the design, doubtlessly complicated customers unfamiliar with this interface.
Advantages of Adhering to Greatest Practices
Adhering to finest practices ensures a constant consumer expertise throughout completely different units and browsers. It results in elevated conversion charges by offering a streamlined purchasing course of. Moreover, accessibility tips are paramount to make sure inclusivity for customers with disabilities.
Significance of Accessibility for Customers with Disabilities
Making certain accessibility is essential for a optimistic consumer expertise for everybody. This contains incorporating correct coloration distinction, utilizing various textual content descriptions for photographs, and making certain correct keyboard navigation. Customers with disabilities, together with these with visible impairments, motor impairments, and cognitive variations, ought to have the ability to simply use the “Add to Cart” button.
Examples of Properly-Applied “Add to Cart” Buttons Beneath Pictures
Quite a few e-commerce websites show efficient placement of the “Add to Cart” button beneath the product picture. These websites usually make the most of a easy, uncluttered design, sustaining a transparent visible hierarchy that prioritizes the decision to motion. Visible examples of well-implemented button placement spotlight some great benefits of clear visible cues and intuitive interplay.
- Visible Hierarchy: A well-implemented “Add to Cart” button beneath the picture maintains a transparent visible hierarchy. The button is well discernible and clearly communicates its objective. The button’s coloration and dimension distinction with the encircling parts, guiding customers in the direction of the motion.
- Responsiveness: The design adapts to completely different display screen sizes and resolutions. The button maintains its visibility and usefulness, no matter whether or not the consumer is searching on a desktop pc, pill, or cell phone.
- Accessibility Issues: The location makes use of correct coloration distinction, making certain the button is well seen to customers with visible impairments. Different textual content descriptions are included for all photographs, offering extra context for display screen readers.
Finish of Dialogue
In conclusion, this information supplies an intensive method to putting WooCommerce “Add to Cart” buttons beneath photographs inside a Divi-based web site. By addressing responsiveness, styling, and integration nuances, it empowers customers to optimize their e-commerce web site for a seamless and visually interesting purchasing journey. The detailed steps, examples, and troubleshooting suggestions supply a sensible roadmap for reaching an expert and user-friendly on-line retailer.
FAQ Compilation
How do I stop the button from showing earlier than the picture hundreds?
Make use of JavaScript to dynamically show the button after the picture hundreds. Use the `onload` occasion for the picture component to set off the button’s look.
What if the picture dimension varies considerably?
Implement responsive design rules for the button. Use CSS media queries to regulate button sizing and positioning primarily based on completely different display screen sizes and picture side ratios.
How do I heart the button beneath the picture?
Make use of CSS methods like `text-align: heart;` or versatile field layouts to exactly heart the button beneath the picture, no matter picture dimensions.
How can I customise the button’s type?
Make the most of CSS to regulate button colours, shapes, fonts, and different visible parts. Make sure the button’s type enhances the general Divi theme’s aesthetic.
